Public Billing Profile
As part of your DepositFix subscription, you can create a Billing Profile page for Stripe payments and subscriptions.
Setting up The Billing Profile
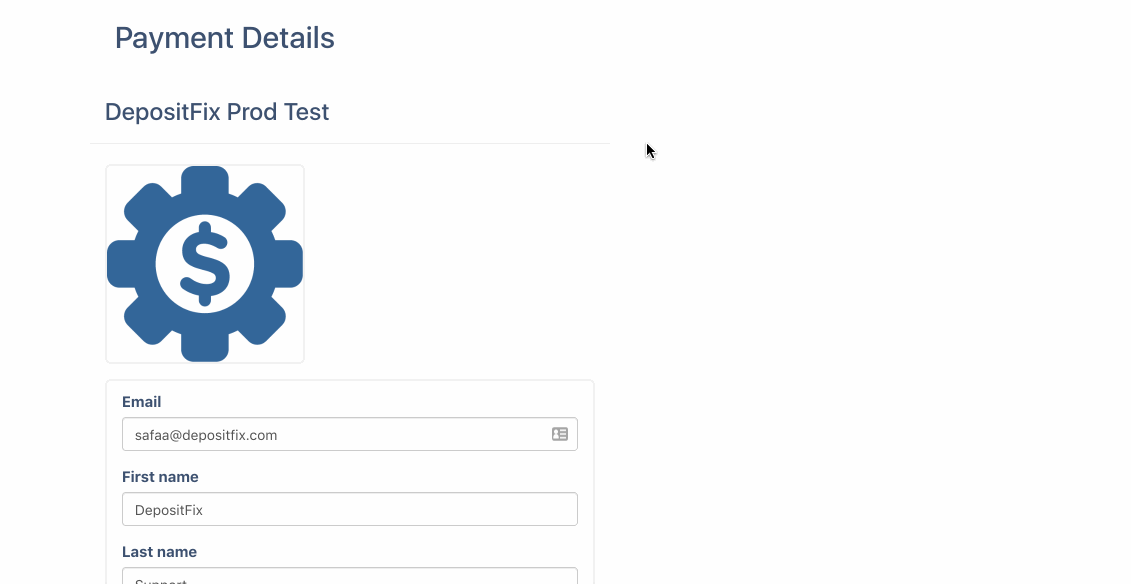
Each customer will have a unique customized page built for them and hosted by DepositFix, with the information pulled from Stripe.
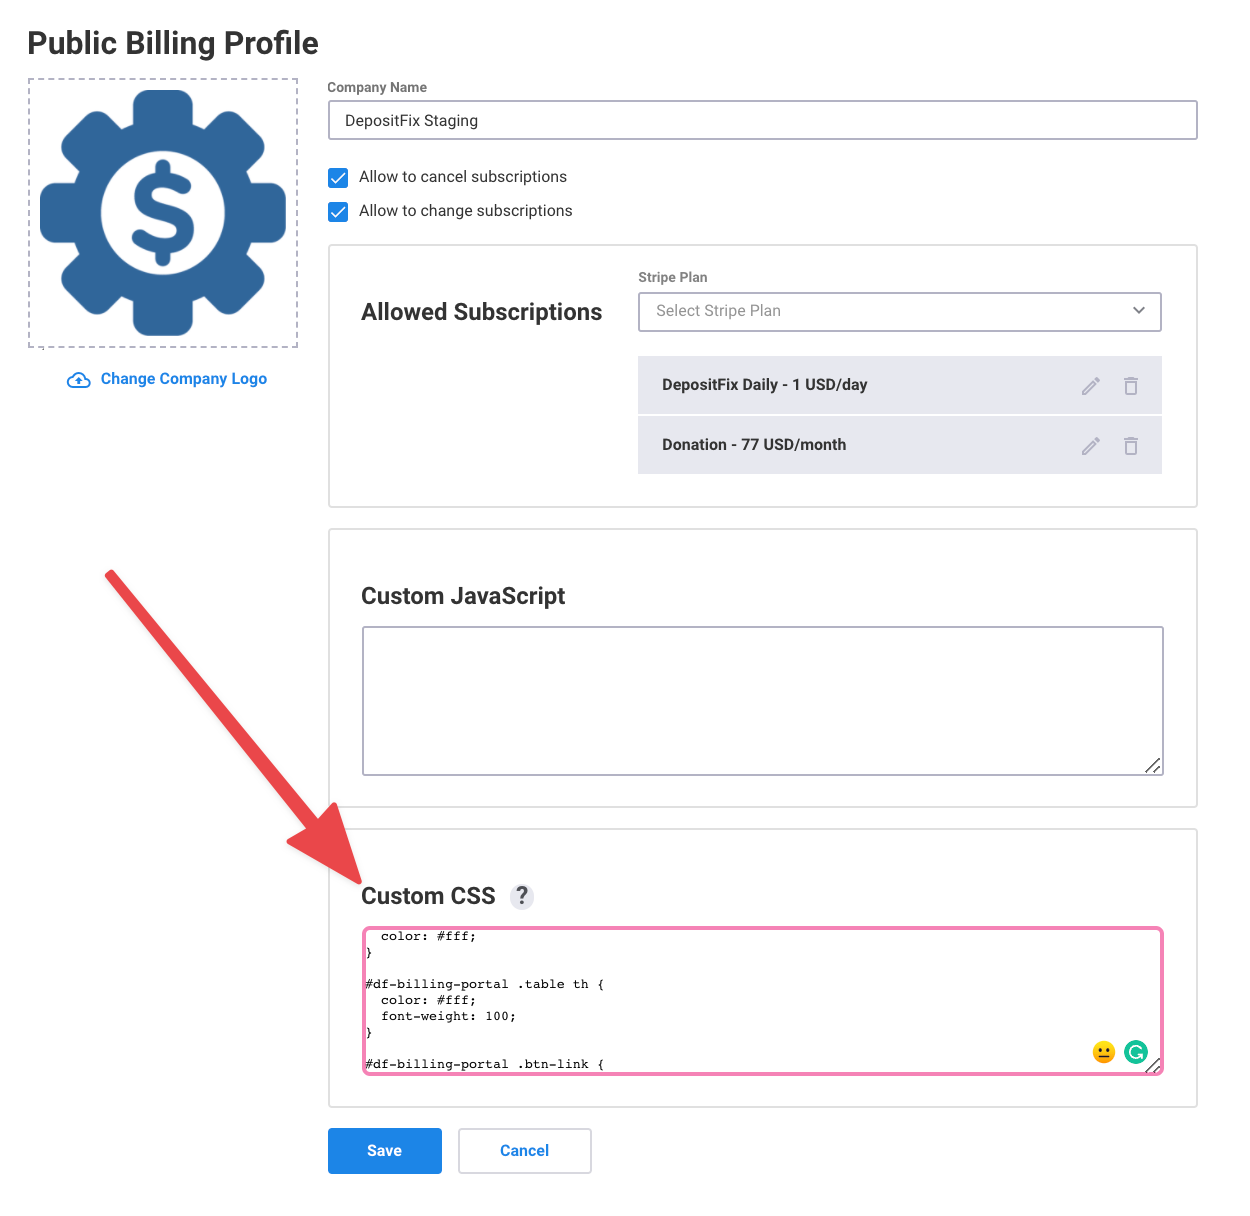
You can manage the billing profile page from Settings -> Public Billing Profile
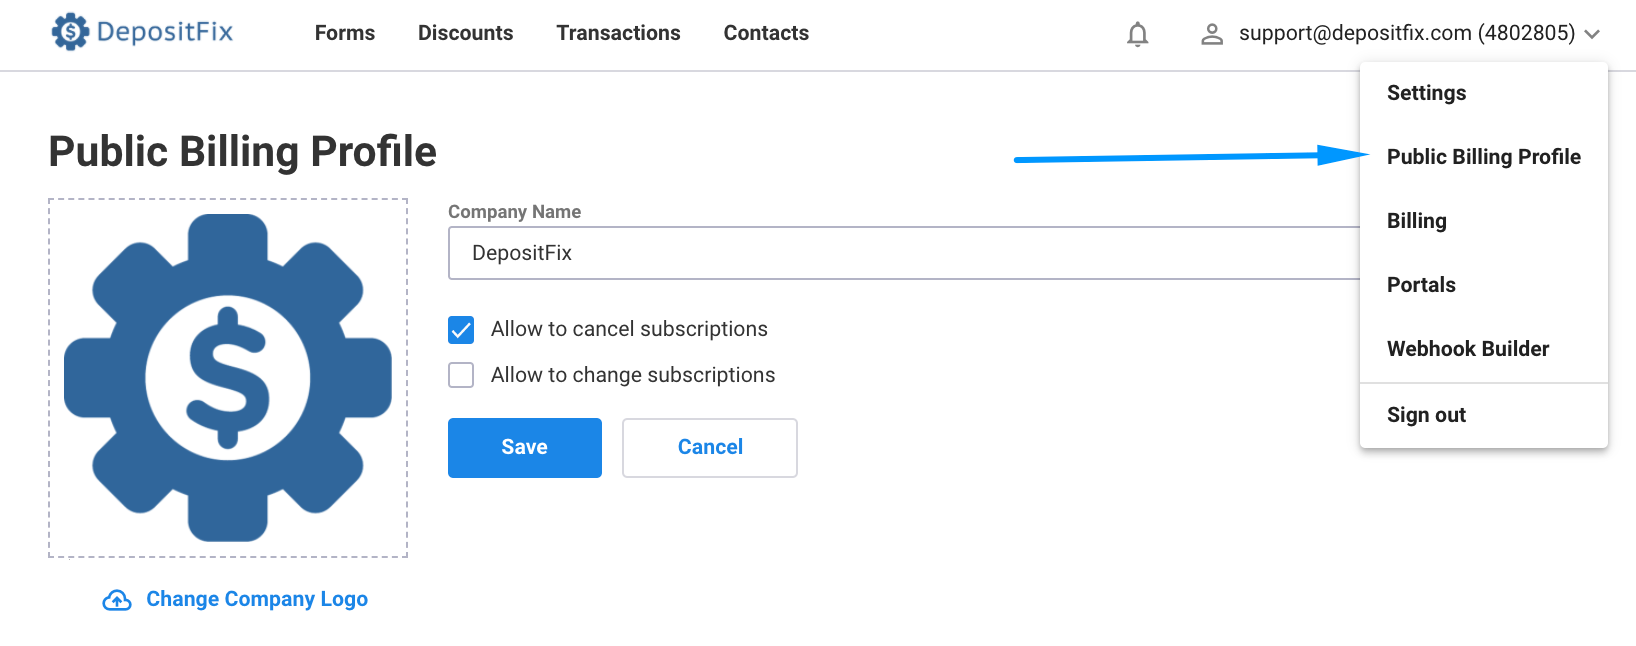
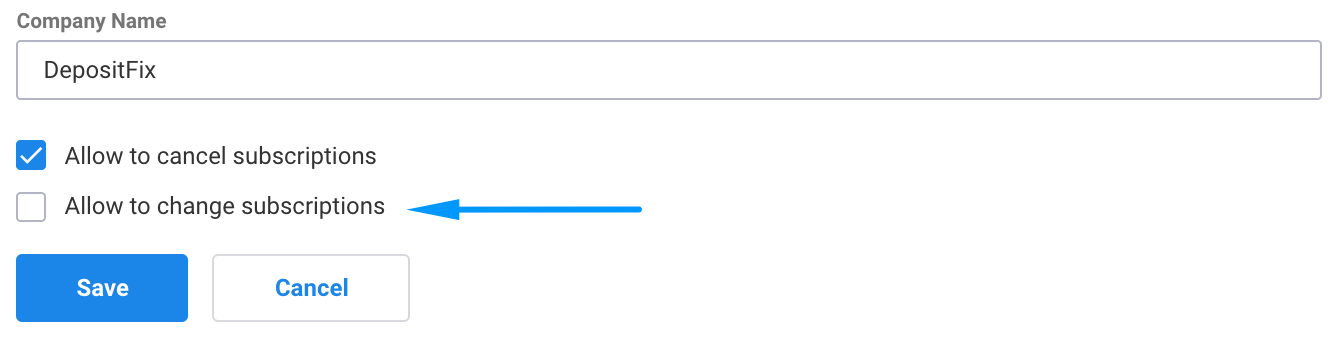
You can update your company name and logo and choose to enable or disable it, allowing customers to cancel or update their subscriptions. You can also change the styling on your billing profile and use custom CSS to match your design.
Using The Billing Profile
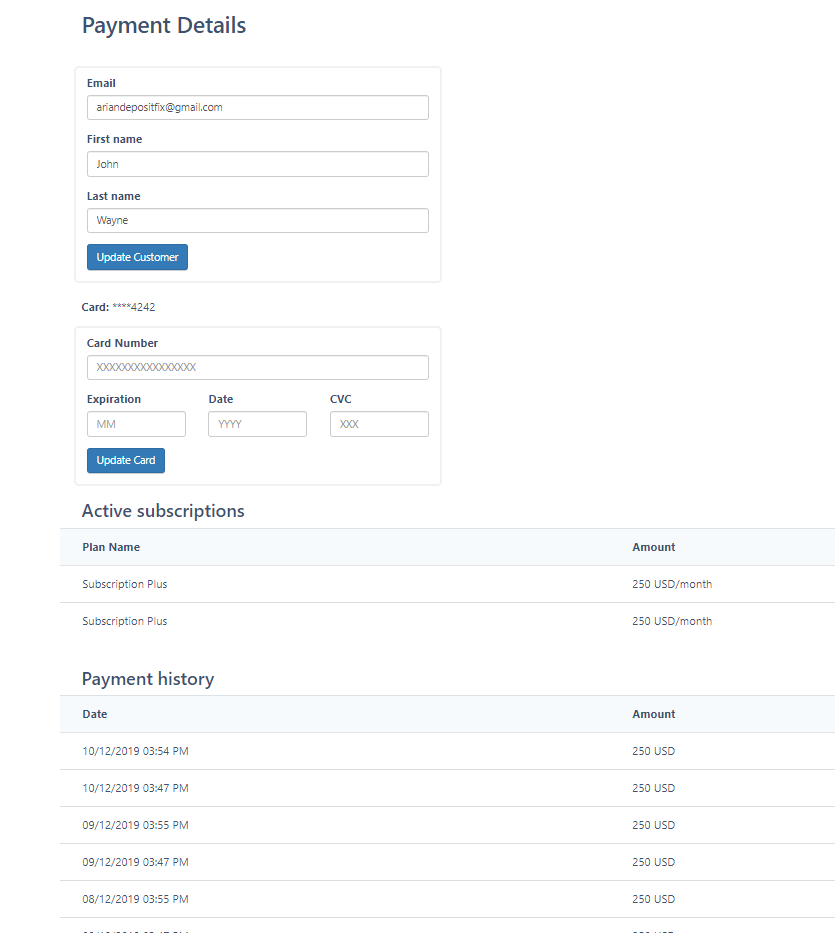
The page includes:
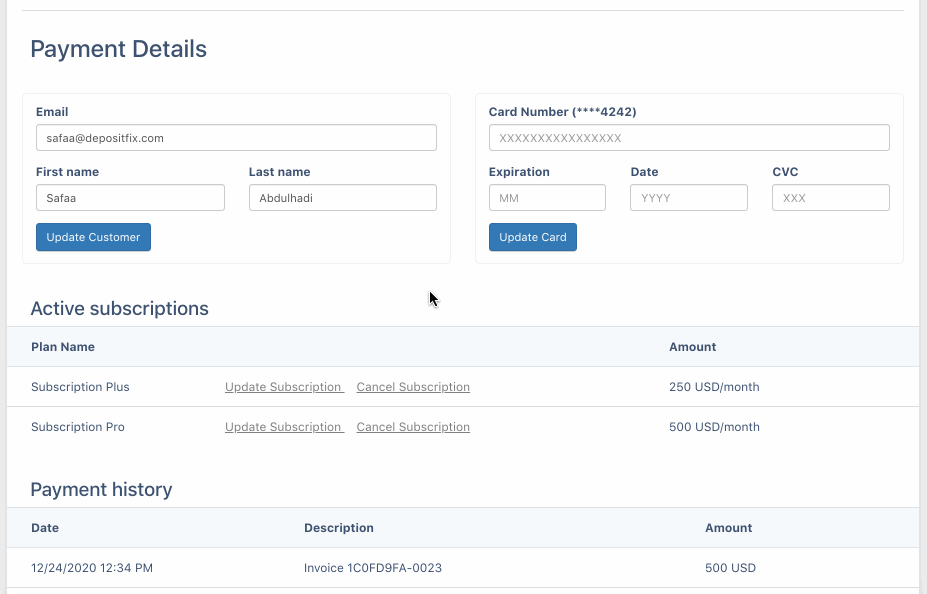
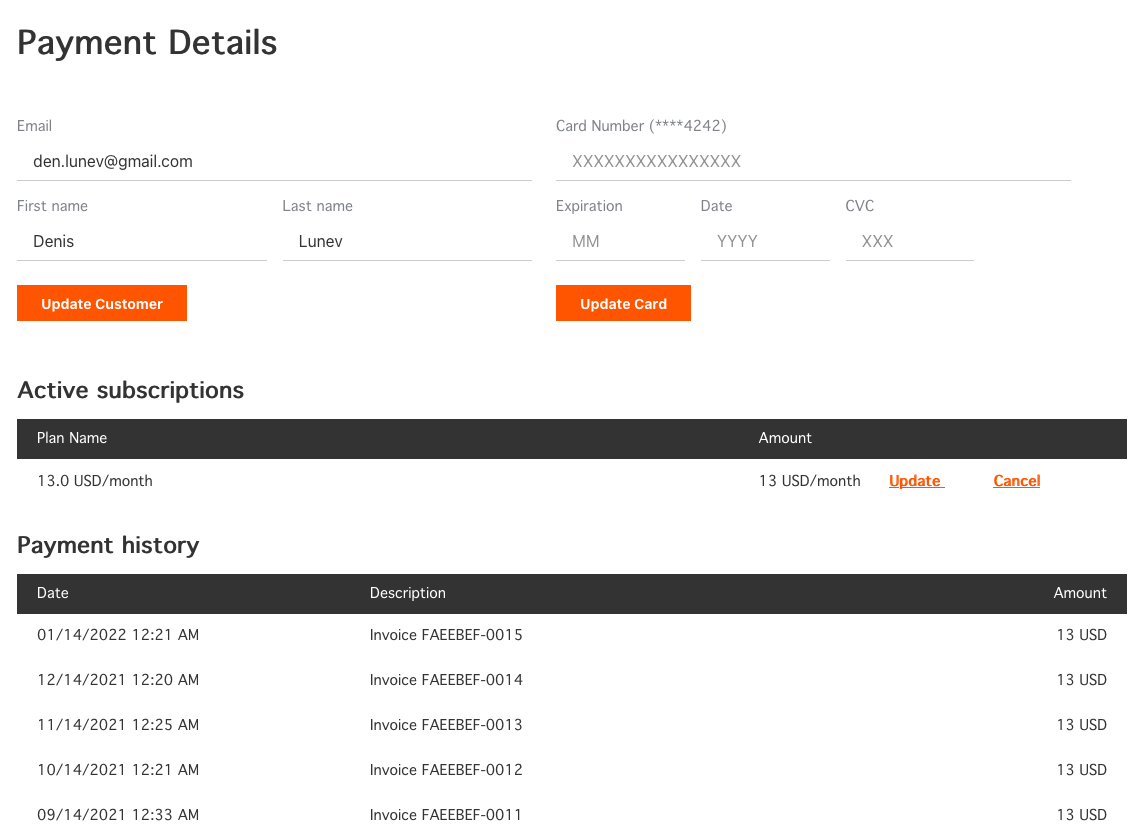
Customer Basic Details: Company name, Logo, Email, First Name, Last Name, and last four digits of the card number.
Payment Details: Active Subscriptions and Payment History.
📌 You or your customers can update their information from this page and manage their subscriptions
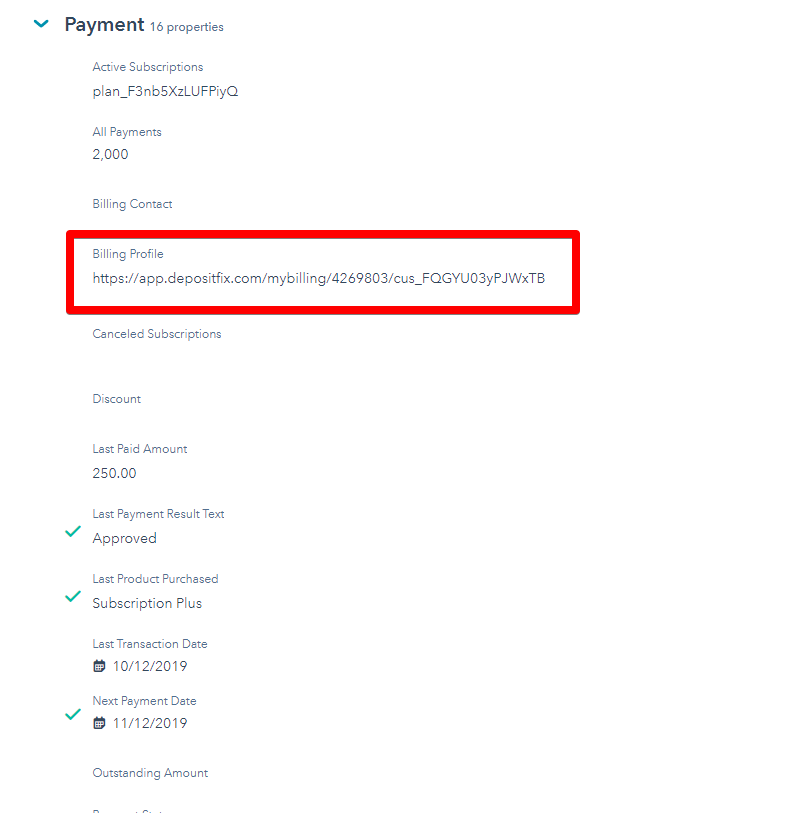
The link can be retrieved from:
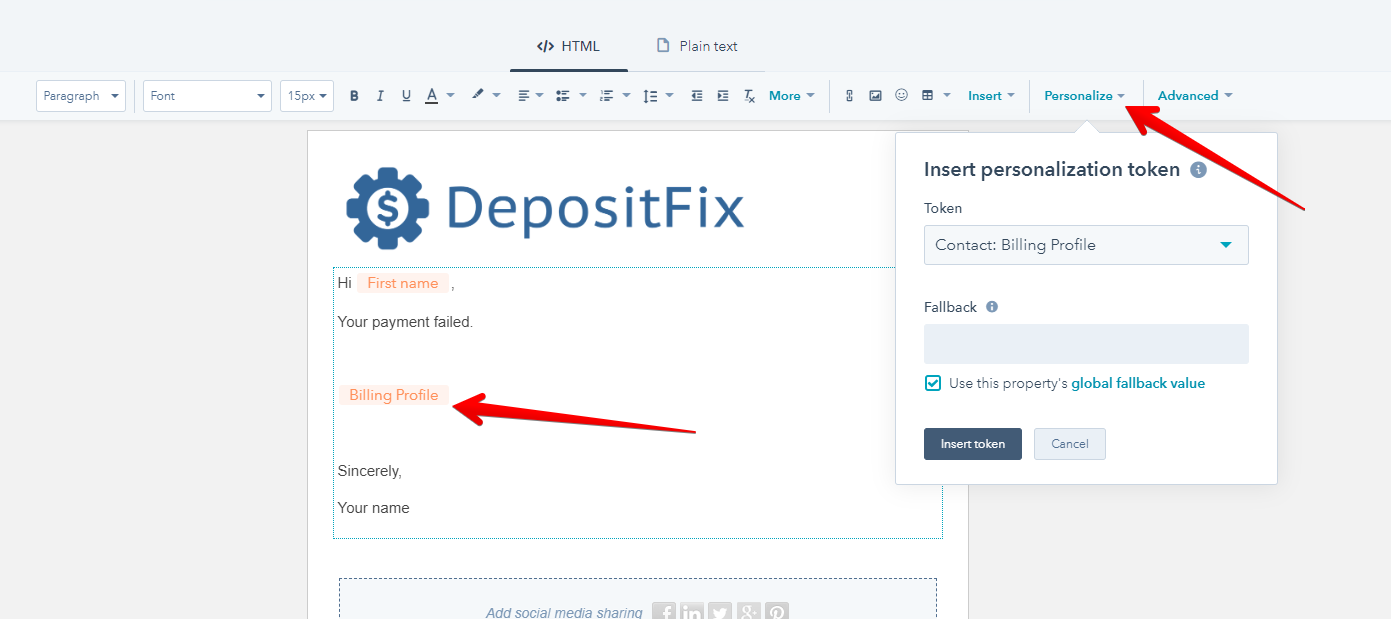
HubSpot CRM - Contact - Payment Group Fields - Billing Profile Property
You can send the URL generated from the payment field to your customers for reference or if you want them to update their information.
For HubSpot users, you can insert the link through the Personalize tool.
Update Subscription - Billing Profile
You can allow your customers to change and update their subscriptions from the billing profile. Furthermore, you can control which subscriptions they can change into.
- Make sure Allow to change subscriptions is checked on the billing profile settings page.
- Select the subscriptions you want to show your customers when they update.
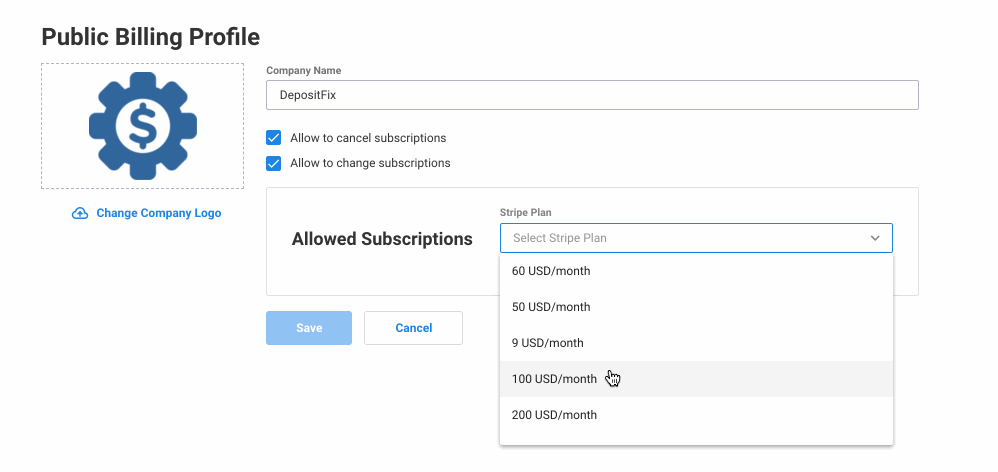
- Click Save
On the billing profile, customers can see “update subscription” and choose the new subscription they want to update to.
Custom CSS for Billing Portal
Using custom CSS, you can style the billing profile to match your website or your branding style (see code sample below). This will allow you to seamlessly style and design your customer’s billing profile as you’d like.
To add custom CSS from your DepositFix dashboard, click on Settings > Billing Profile, scroll down to Custom CSS, and add your code.
Example of custom billing profile CSS here.
#df-billing-portal {
  font-family: Geneva;
  background-color: #fff;
}
#df-billing-portal .df-header-container {
  background-color: #333;
}
#df-billing-portal .company-logo {
  width: 24px;
}
#df-billing-portal .company-name {
  font-size: 16px;
  color: #fff;
}
#df-billing-portal .payment-details-header {
  text-align: center;
}
#df-billing-portal .user-info-container {
  background-color: #fff;
  border: 0px solid #cdcdcd;
  margin: 0px;
  padding-left: 0px;
}
#df-billing-portal .form-group label {
  font-weight: 100;
}
#df-billing-portal .form-group input {
  border: 0px;
  border-bottom: 1px solid #ccc;
  border-radius: 0px;
}
#df-billing-portal button.button-dpf {
  background-color: #f50;
  border-radius: 0px;
}
.payment-details-subheader {
}
#df-billing-portal .table thead {
  background-color: #333;
  color: #fff;
}
#df-billing-portal .table th {
  color: #fff;
  font-weight: 100;
}
#df-billing-portal .btn-link {
  color: #f50;
  text-decoration: underline;
}